Google Forms
If you have a Google account or Gmail email address, you have access to
Google Forms. To open this application, visit https://docs.google.com/forms/ or
follow the instructions below.
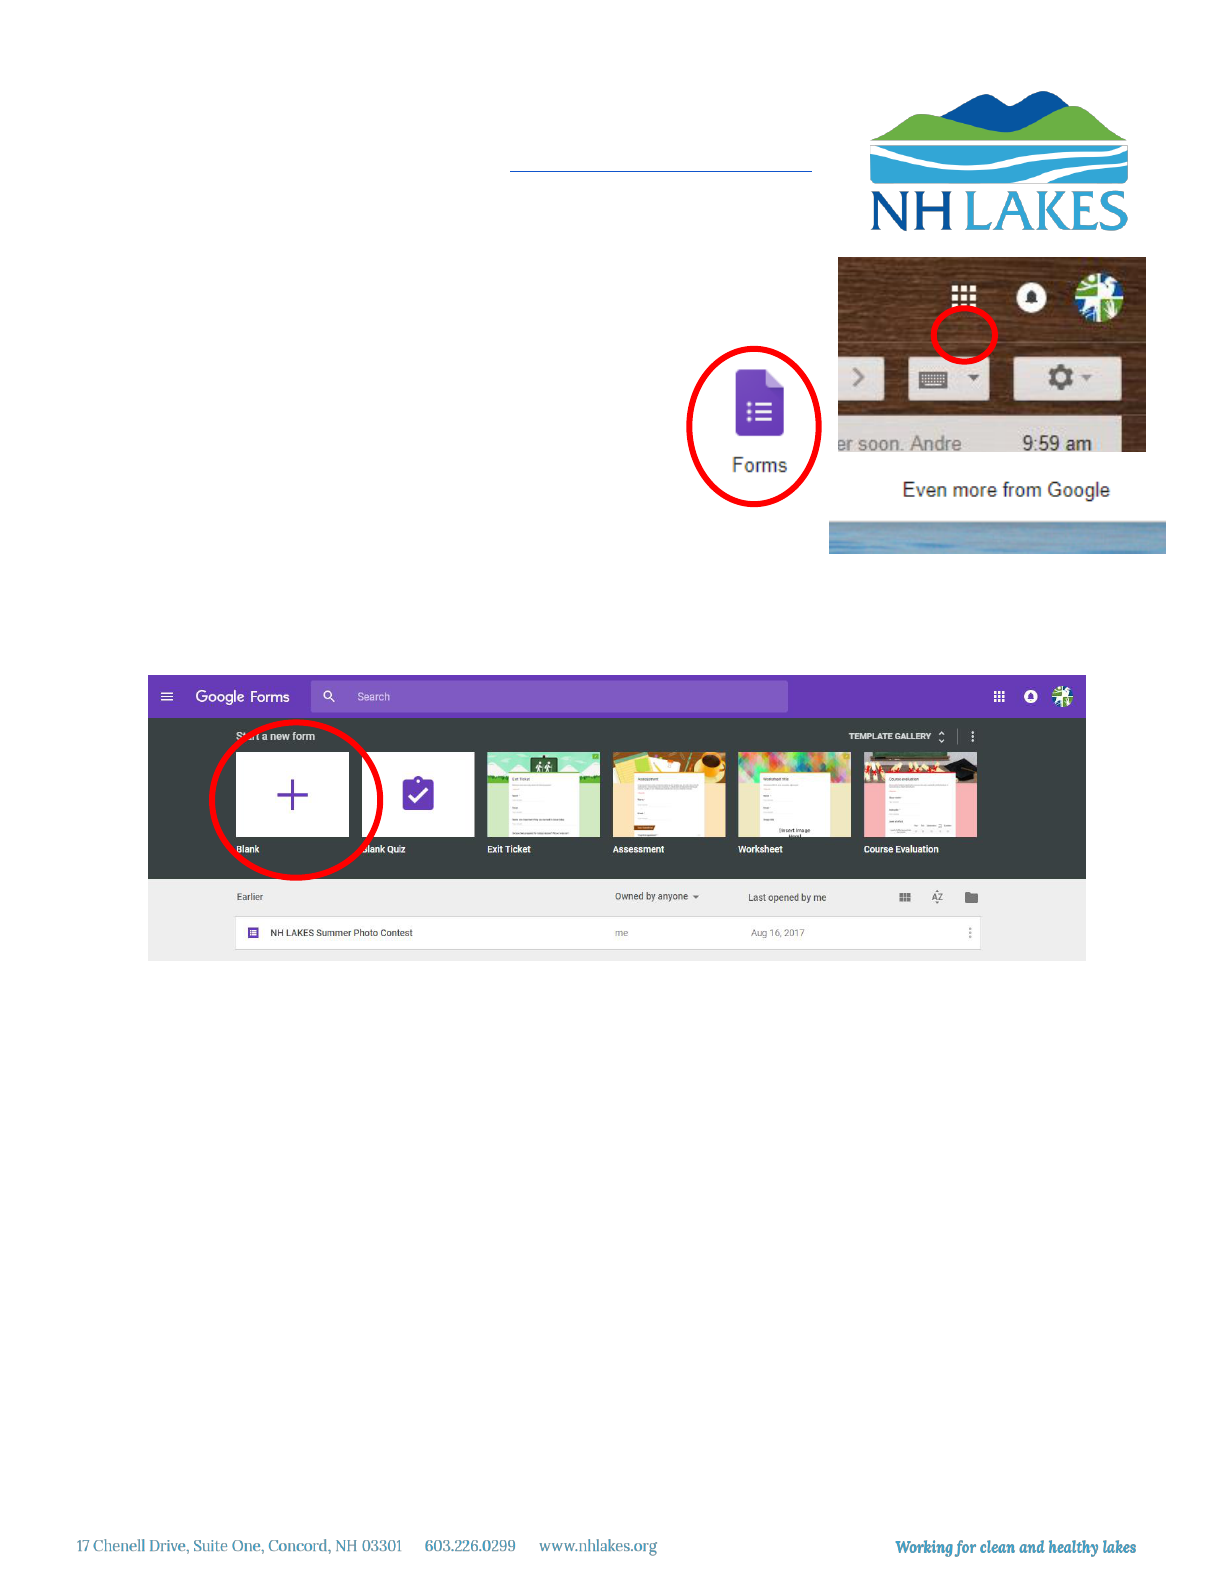
Log into your Gmail account. In the top right corner, click on the grid of nine
squares.
A menu will appear. Click on the purple icon labeled “Forms.”
If you do not see this icon, scroll to the bottom of the menu
and click on “Even more from Google.” Scroll down the new
page until you see the purple icon called “Forms” and click
on it.
A new page will open.
Creating a Form/Survey
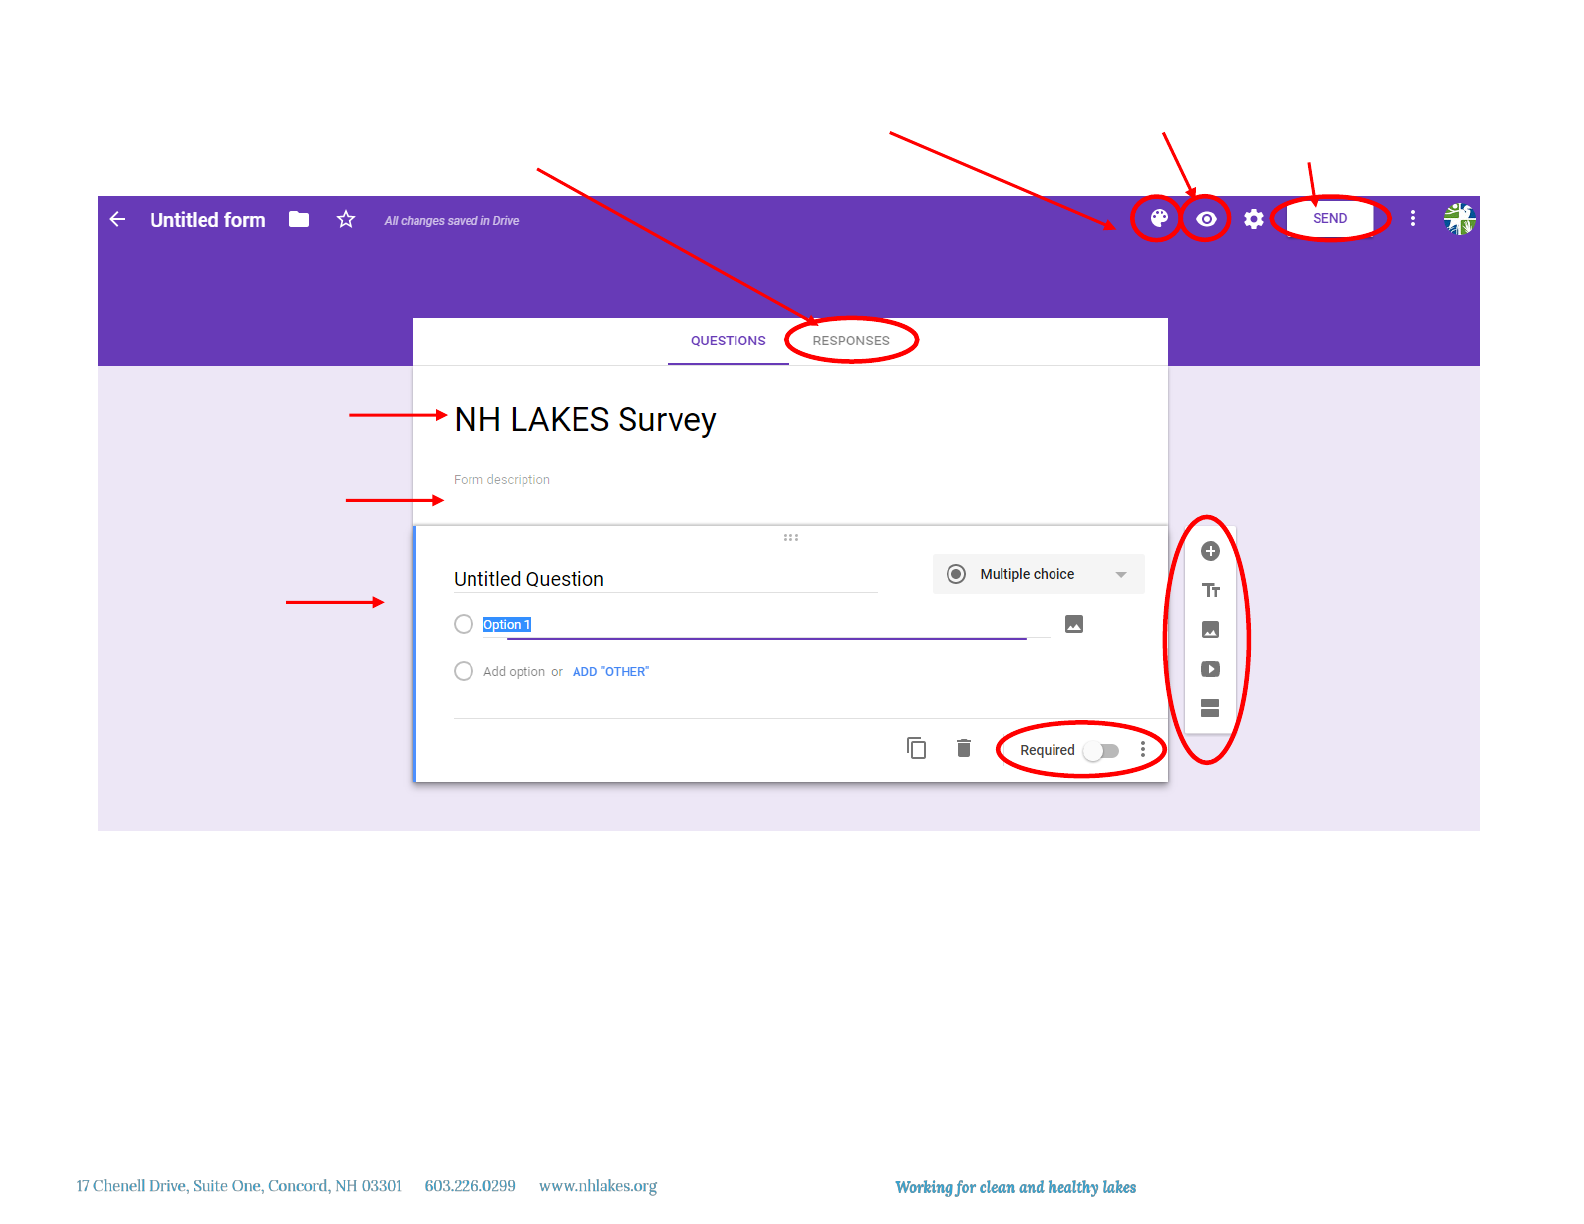
You should see something like this:
Under “Start a new form,” click on “Blank” (with the plus sign) to create a new custom survey, or click on any
of the templates to start creating. Name your survey, and describe the purpose of the survey.
Add your first question: click on “Untitled Question” to enter your question, and then use the dropdown menu
to the right to select the type of response (multiple choice, etc.). You can add options for multiple choice
questions, and if you wish to add a place for “other” responses (responses outside the provided responses),
just click on “Add Other.”
Use the switch marked “Required” at the bottom right to mark the question as required.
You can use the plus sign on the right side to add questions, photos, videos, or divide your survey into
sections. If you’d like to customize the color and background of your survey, click on the artist palette at the
top right of the page.
Click on the eye in the top right corner to preview your survey. See below for guide.
Change colors and
background.
Preview survey.
Survey Title
Survey
Description
Question
information
Add question
Add section title
Add photo
Add video
Divide into sections
Send your
survey.
Click here to view survey
responses.
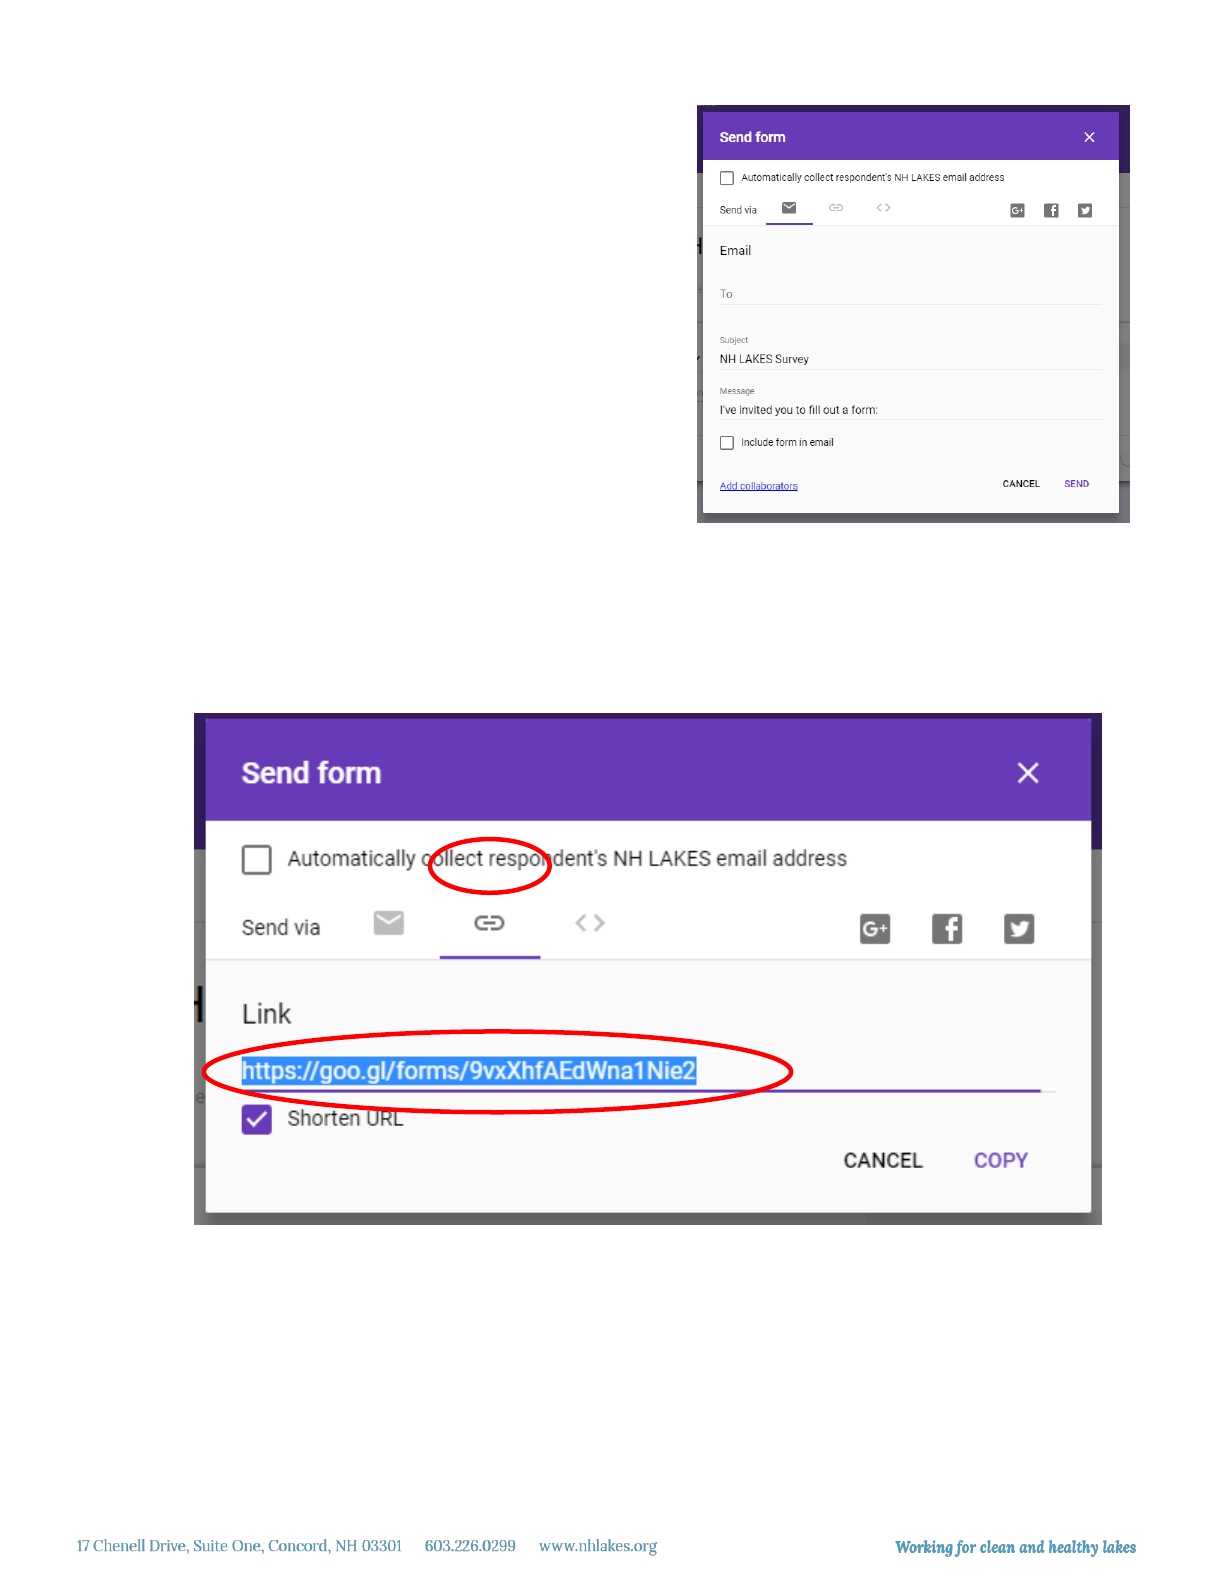
Sending your survey
To send out your survey, click the SEND button in the right
hand corner. You will then have three options: send out an
email directly with the survey (great for testing); get a link to
your survey (recommended); and get the HTML for
embedding the survey in your website.
You will also have three buttons allowing you to share the
survey on Google+, Facebook, and Twitter, if you choose.
If you are surveying a large group, we recommend getting the
link to your survey and including it in an email to your
membership. Emailing the survey directly to them using this
pop up form may not include the information you wish to
provide on the survey and why they are receiving it.
To get the link to your survey, click on the chain icon to the right of “Send via.” You can copy the link it
provides and use it in your email or e-newsletter. You can also click on the box labeled “Shorten Link” to make
the link more manageable. Click “Copy” and you’re ready to send it out!
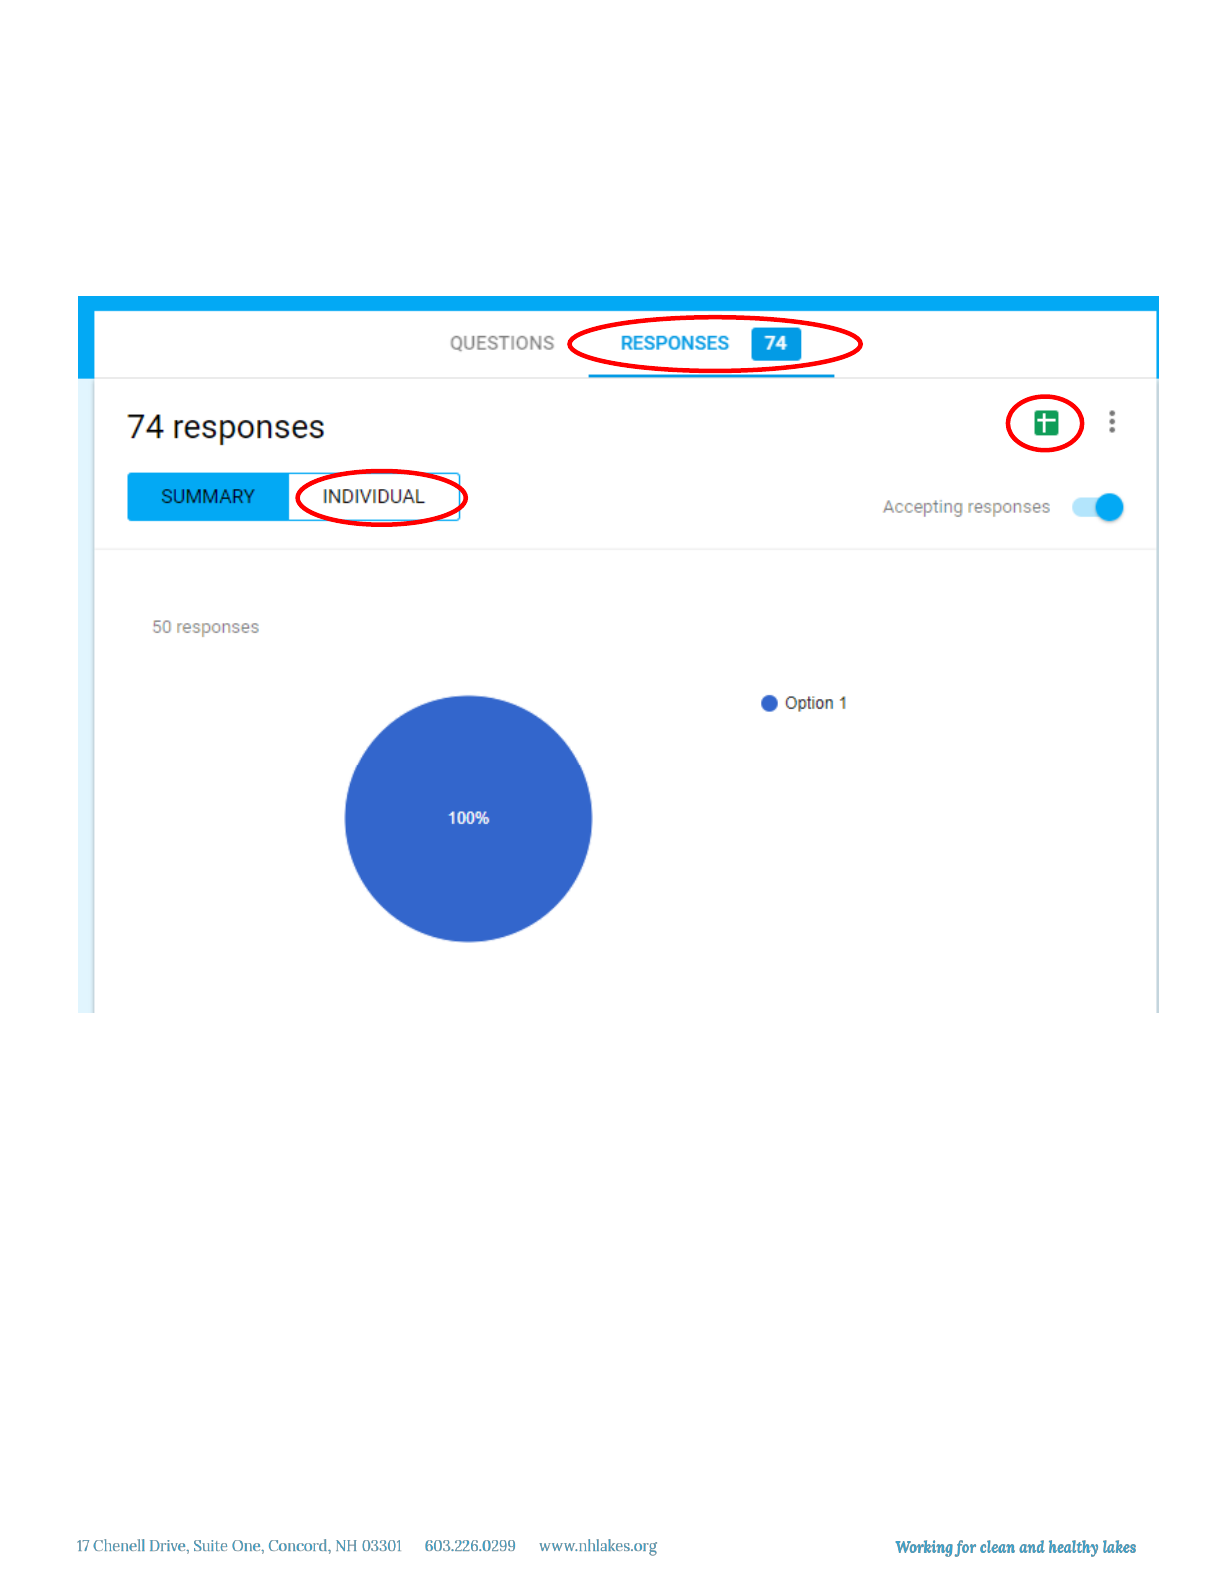
Collecting and viewing responses
To view the responses to your survey, simply click on the “Responses” tab on your survey. You can view a
summary of the responses, or view them one at a time. To see each response, click on “Individual.”
You can also download an Excel spreadsheet of responses by clicking on the green spreadsheet button.
